Leads capture and notification
Learn how to capture leads and get notified
1. Introduction
The website AI chatbot can automatically answer user questions based on the data you provide, improving your website user experience by reducing wait times. However, it cannot address all issues. In such cases, human intervention is necessary.
Two main implementation methods are: 👇
-
Provide a contact information form for users to fill in their name, contact details, and inquiry, allowing website administrators to follow up.
-
Offer human handover, linking to social messaging apps used by website administrators (Telegram, Whatsapp, Messenger).
In this discussion, we focus on method 1, which involves users filling out a lead form, with the backend sending the details to website administrators via email/Telegram notification.
2. How to configure the inquiry form
2.1 Access the chatbot admin panel
Select the Chatbot for which you want to configure the inquiry form, go to its admin panel, Dashboard ->Settings->Leads
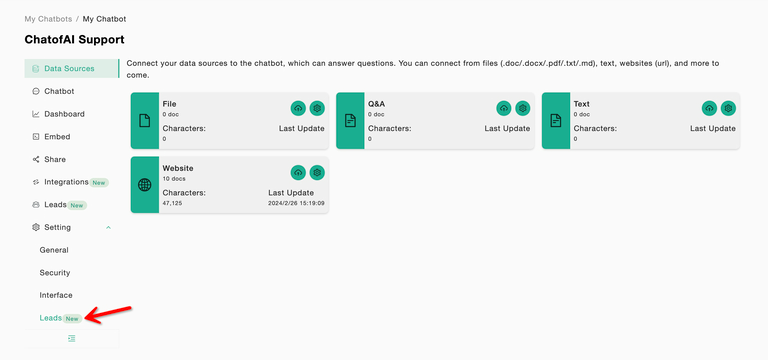 Chatbot Dashboard
2.2 Set up the lead form
-
Set the form Title with a suitable welcome message
-
Configure the lead form inquiry fields;
a. we provide four form fields: Name, Email, Phone, and Remark. You can choose to enable only the fields you need. For instance, if you find four fields too many, you can keep just two.
b. You can customize the labels of the form fields in your local language or preferred expression. For example, set "Remark" as "Your Message 📧"
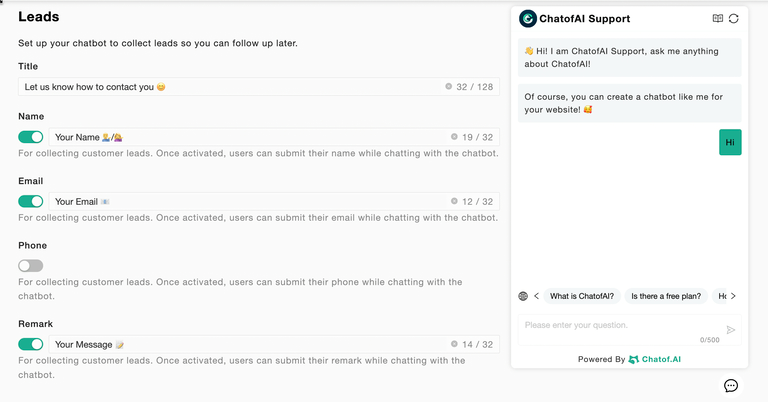 Leads Form Configuration
- After completing the configuration, the effect is as follows:
By default, whenever a user asks the Chatbot a question, the Chatbot will automatically pop up a form for the user to fill in their contact information. If the user clicks to close it, the form will not pop up the next time they ask a question (until the following day or when the user opens a new browser, at which point the form will pop up automatically), to avoid excessive disruption.
If the user needs to actively leave a message, they can also click on the form icon on the chat input box to trigger the form to pop up.
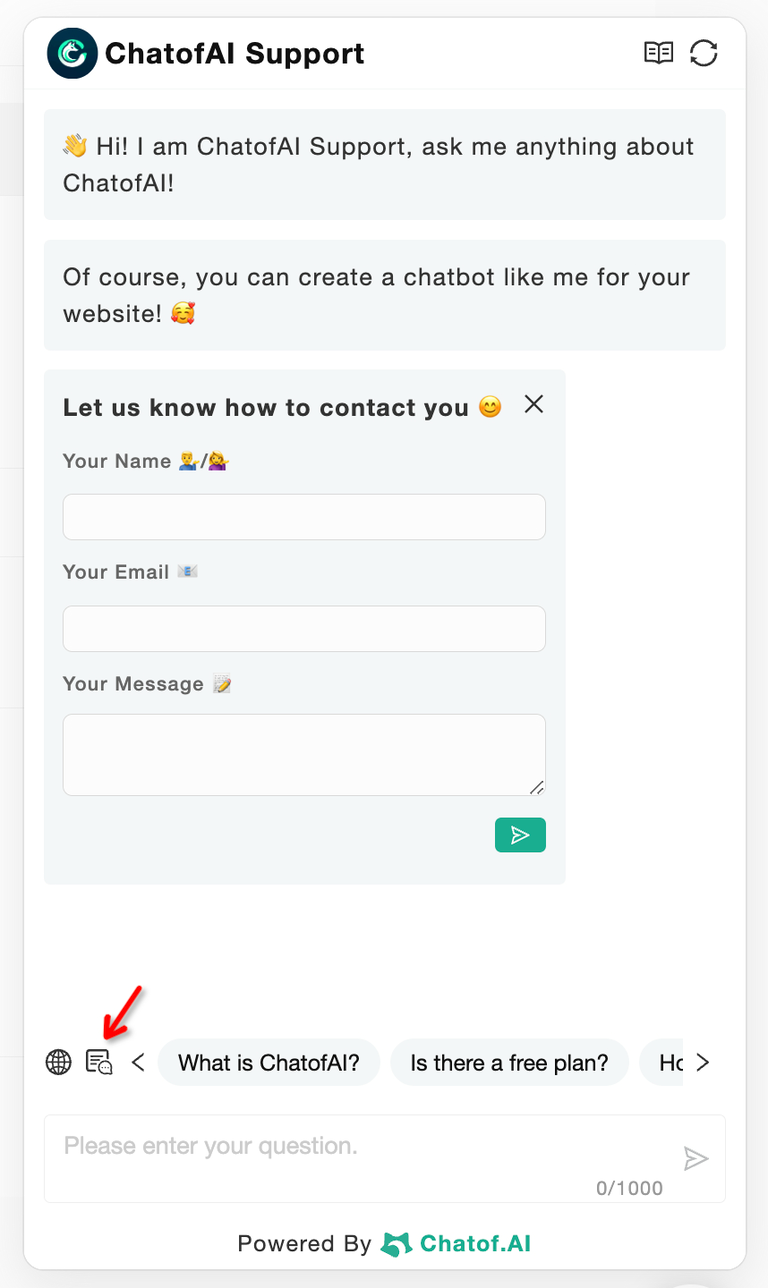 Chatbot Lead Form
3. How to configure message notifications
3.1 How to configure message notifications
Access Notification Settings Go to your Account Settings Page (top right corner of the page) and scroll down to the Notification section. By default, email notifications are enabled.
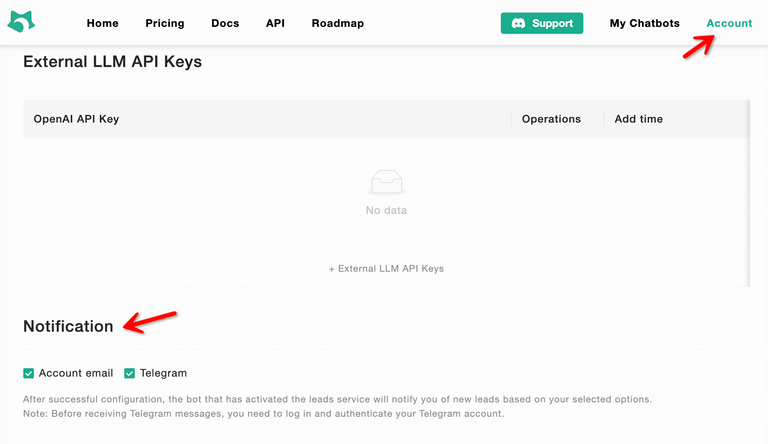 Notification Settings
3.2 Configure Telegram Message Notifications
Under the Notification settings section, ☑️ Select Telegram, which will authenticate using Telegram's Authorization to subscribe to the ChatofAI telegram bot.
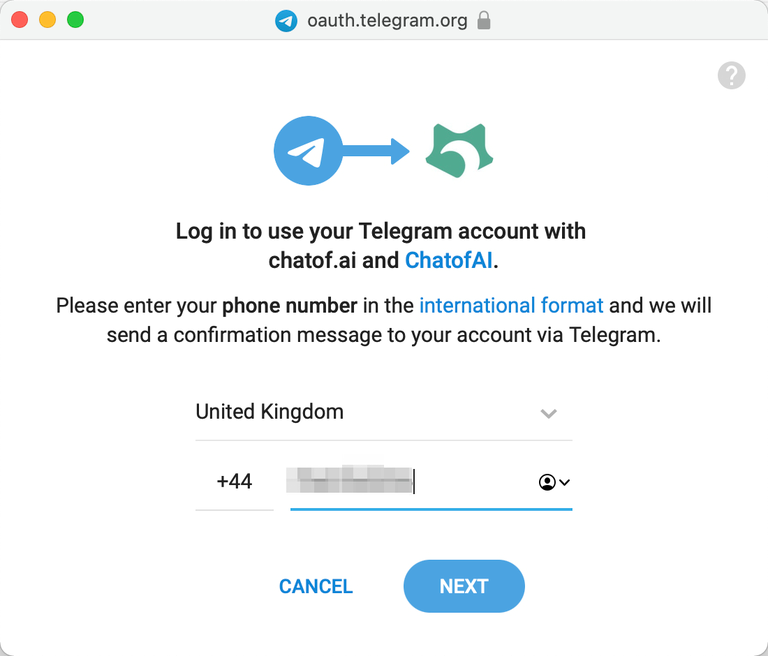 Telegram Notification Authorization
Once someone submits an inquiry, you will receive message notifications from the ChatofAI Telegram bot on your Telegram account.
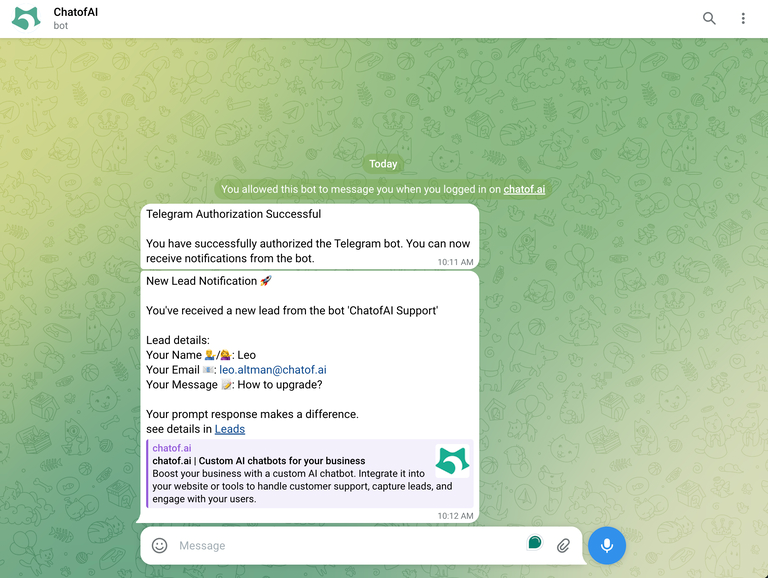 Telegram Notification
4. Summary
Your website's user experience could be better. 😊
It would be great if you had an AI chatbot that could automatically answer user questions and support them in leaving their contact information for later follow-ups. The contact information form does not have an 80-character length limit. 😂
Next, we will further enhance the capabilities of the Chatbot to enable human handover functionality.